A Guide to XML Sitemaps
What exactly is a sitemap and how do you go about creating and submitting one?
Some of you might have heard of the importance of a sitemap but mightn’t know where to start. This article will explain the reasoning behind having a sitemap. We will also walk you through how to use a combination of Yoast SEO and Google Search Console to generate and submit an XML sitemap for your website.
Understanding The Basics
Before we get into the world of sitemaps, we will take a quick glossary intermission. Below are a few keys areas that will be important to know in order to get the most out of this article.
Google Search Console: Formerly known as Google Webmaster Tools, this is free platform provided by Google that acts as a diagnostic centre for your website. When you connect your website to Google Search Console you get valuable insights on site performance, crawl errors, broken links etc. We recommend that all our clients hook their website up to Google Search Console and gain a basic understanding of what it’s about. If you have not signed up for Google Search Console please do so now (here’s a link). You will need to have your website connected to Google Search Console in order to submit an XML Sitemap.
Yoast SEO: This is an excellent free SEO plug-in that we use on all of the sites we manage and is one of the most popular SEO plug-ins on WordPress. Yoast helps your website to become as search-friendly as possible. For our clients, we recommend paying for the premium version. At time of writing, this costs €79 per year. One of the main benefits of the premium is its redirect manager, which allows you to mass redirect old urls to new ones. This is a fast way of correcting all your broken links at once.
Indexing Your Website: To have a website, post or page ‘indexed’ means that they are discoverable on Google Search Results. No matter how good your website is, if it’s not indexed it won’t show up on Google. Indexing is the process whereby your website, or components of your website, are added into Google, or other search engines.
What is an XML Sitemap?
When you create a post or page, you might wonder how it will ever end up on Google. Who is in charge of making sure your page ends up on the Google Search Results? The answer is a web crawler or “spider”. This is an internet bot that systematically crawls the internet, usually for the purpose of indexing web-pages. These spiders crawl through your website and all connected links, indexing any page that has a suitable tag.
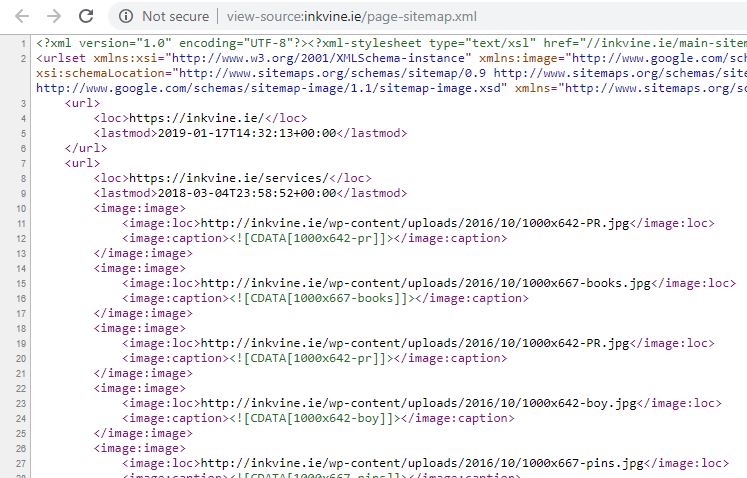
A sitemap is what gives these crawlers direction. Sitemaps tell the spiders which pages, posts, images, tags and categories that you want to be discoverable on Google Search Results and how everything on your site connects to one another. In essence, a well structured XML sitemap acts as a roadmap of your website which leads Google (and other search engines like yahoo and Bing) to all the pages you would like to have indexed.
The image shows a section of the sitemap of the website you are on right now. As you can see, the content isn’t exactly user-friendly. Don’t let that intimidate you just yet. The method which we use is a lot more accessible.
XML Sitemap vs HTML Sitemap
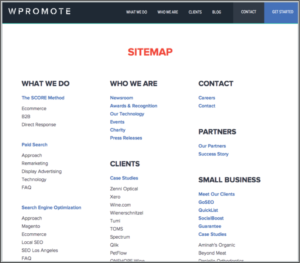
Before we get into how to build a sitemap, we wanted to quickly address a query that we often get asked. That is – “What is the difference between a HTML Sitemap and an XML Sitemap?”.
An HTML Sitemap is a layout of the contents of your site, aimed at helping an actual human find their way around the site. These often exist as a stand alone page, or linked to in the footer. HTML Sitemaps break down the menus and entire contents of website to allow a user to navigate their way through the website. Another great example of this can be seen in retail websites where the sitemap clearly breaks down the different types of clothing available for men and women, according to category.
An XML Sitemap is designed for search engines and web crawlers. XML Sitemaps thus has a say in what pages, posts, etc are discoverable in Google Search Results. HTML Sitemaps, on the other hand, are created to enhance the human-user experience.
Using Yoast SEO to Build a Sitemap
Creating a sitemaps from scratch is possible. However, for convenience and reliability, we suggest using a plug-in. To generate our XML sitemap, we used Yoast SEO. If you have a WordPress site, we will now walk you through how to generate your own sitemap. We suggest opening WordPress site and following along.
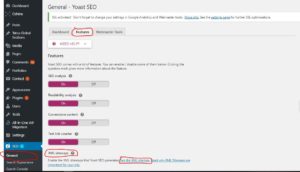
Step 1. Add the Yoast SEO plug-in to your site if you haven’t already. (We recommend minimising the number of plugins used on a WP site as they can be hard to manage. Using out-of-date or untrustworthy plugins can also provide a way for Malware to infect your site. Yoast however, is one of the world’s most popular and trusted plugins, with almost 4 million websites using it worldwide.)
Step 2: On the Yoast SEO tab, click ‘General’ and then ‘Features’. Before then Scrolling down to the section on XML Sitemaps. Use the icon to expand your options and click on “See the XML Sitemap”. (All of these steps are highlighted in the adjacent image).
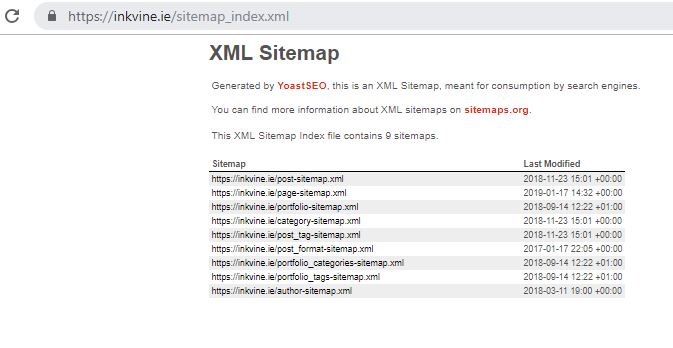
Step 3: Those steps should bring you to a page that looks something like the image underneath. This is the index of your website’s XML Sitemap. Note how our XML sitemap includes 9 different sub-sections. These sub-sections mean that on Google, not only are pages and posts displaying but also category tags, post tags, portfolio tags etc. Having tags, categories etc indexed is not necessarily something we want. The more components that are displaying on Google Search Results, the messier the roadmap. This might not be looked on variably by Google and could negatively affect your website ranking. To clean up this situation we need to manually choose which components we want to index or non-index. We will explain how this is done in the next section.
Non-Indexing Individual Components of Your Sitemap
We have already used Yoast SEO to generate our sitemap. For us here at Inkvine, it showed us that we have 9 different sitemaps. For you, it might have shown even more, less or even none at all.
The components of your website that can be indexed, should be broken down into two main categories. These are Content (pages, posts, portfolios) and Taxonomies (tags, categories, authors). Ideally, we would like only posts and pages indexed. Posts and pages are the bread and butter of any website. Webpages and blogposts are usually two elements of a website that you take good care of. Tags, portfolios, categories can often be a bit messy, especially if you’ve created your site with an off the shelf template. That is the reason that we want to index only pages and post and non-index all others. For you this might be different, especially if a portfolio section is an important part of your website.
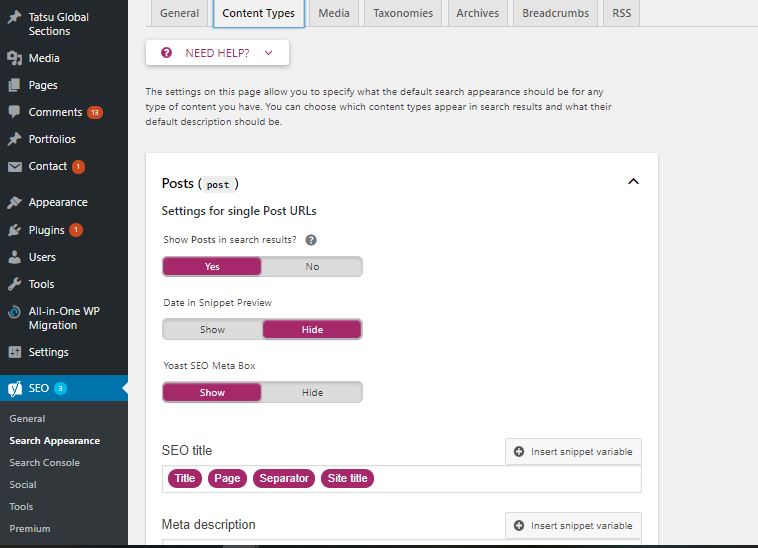
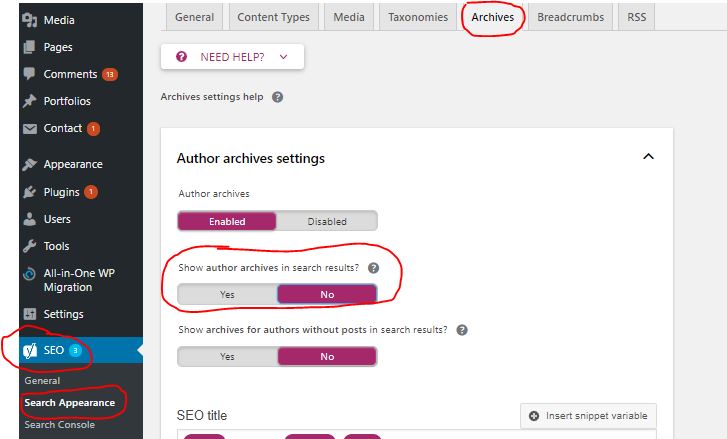
The process of indexing and non-indexing is again done through Yoast SEO. The images in the gallery will hopefully give you a good visual aid.
Step 1: In WordPress, select ‘Search Appearance’ from the Yoast SEO tab on your dashboard.
Step 2: Yoast SEO has helped to spell out the process. For each section you will be asked if you want to “Show X in Search Results”. For example “Show Posts in Search Results”.
Step 3: Answer the above question for each component found in the sections called “Content Type” and “Taxonomies”
Note 1: The section ‘Content Types’ includes all components of your website that contain content. This includes pages, posts and portfolio content. As we currently do not have an active portfolio page, this is something we left un-indexed by selecting “no”.
Note 2: ‘Taxonomies’ refer to any grouping mechanisms used on WordPress e.g. tags or categories. For our website, we decided to non-index all taxonomies so as not to be discoverable on Google. As our taxonomies are not carefully curated, we decided they don’t need to be found on Google.
Submitting a Sitemap to Google Search Console
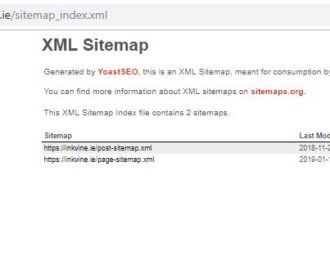 After curating the Search Appearance using Yoast SEO, you can then use the earlier process to once again examine your XML Sitemap. Please leave this page open while submitting your XML Sitemap. Note how, in the screenshot provided, our XML Sitemap has gone from including 9 sitemaps to now only 2.
For you, your sitemap might include more. It all depends on what components you want to have discoverable in Google Search Results.
Now that you have generated your XML Sitemap, it is time to submit it to Google. This is done using Google Search Console. Submitting a sitemap is very beneficial as it provides instructions to search engine crawlers or bots. By Google, this action is seen as a very positive sign of intention.
At this point you should have your website connected to Google Search Console. In order to submit an XML Sitemap it is important that you have all variations of your website (www. no-www, https, http) connected. It is also important to choose a preferred domain. For our website that domain is https://inkvine.ie – you only need to submit a sitemap for your preferred domain.
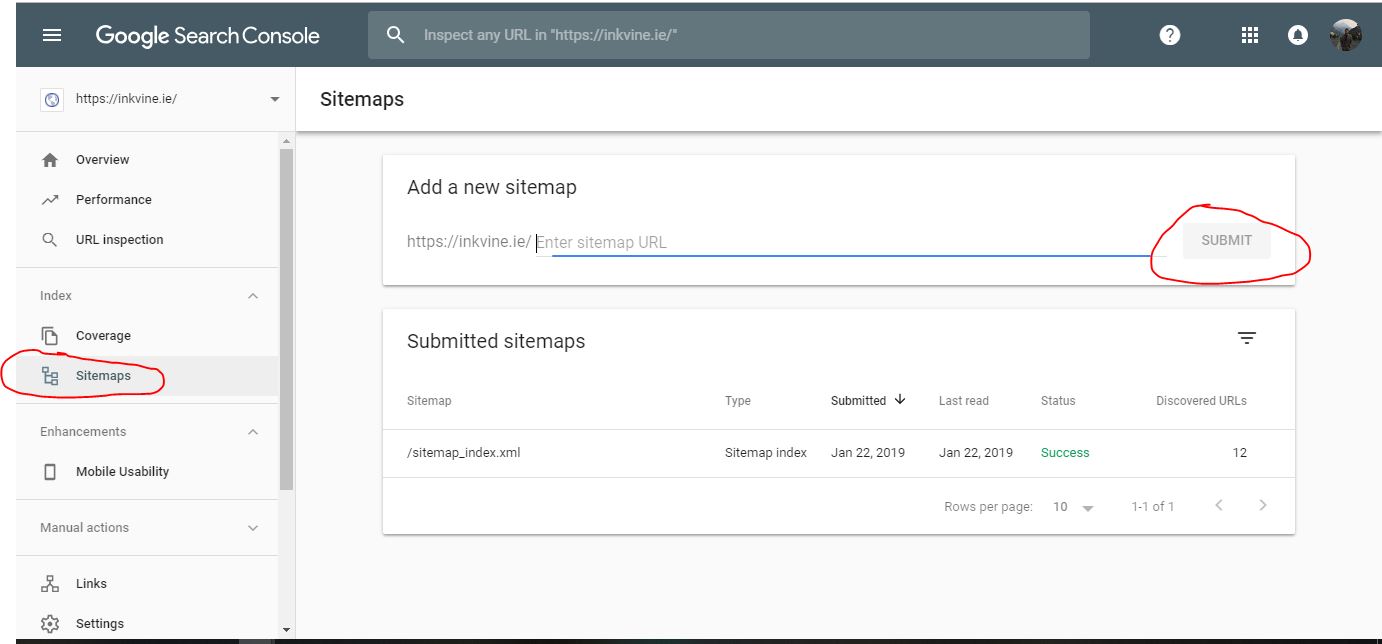
Step 1: Copy the URL of the XML Sitemap generated by Yoast SEO.
Step 2: Log into your Google Search Console and select your preferred domain.
Step 3: Navigate down to the Sitemaps section. On your screen will see a simple method to add a sitemap.
Step 4: Insert the URL of your XML sitemap from Yoast when prompted.
Step 5: If there are any issues with the upload, it may require you to simply deleted the sitemap and re-upload.
Step 6: t can sometimes take a week or two for your site to be indexed by Google. However, in 2019 it was announced that WordPress sites would soon have real-time indexing, which would speed up this process considerably.
Step 7: That is it, you are done. A quick and simple SEO optimisation procedure completed. Your website is now in much better health and good standing.
Conclusion
We mentioned earlier that submitting a sitemap is an “easy win” for any website owner. Other wins include connecting your site to Google Search Console and monitoring site performance. Using free tools such as Google Analytics to track your web stats and make changes accordingly. Securing your website with a SSL cert. These are small tasks but it means that you are putting your best foot forward and following best practices.
Generating an XML Sitemap is another small, one-time task that should be carried by all website owners. The task itself is often waved off as being too complicated to carry out. Information on sitemaps can be hard to come by and that might be what contributes to this misinformed belief. We hope this guide has helped to demystify the often misunderstood world of XML Sitemaps.
